Learn Electricity
From Scratch
You just bought your first multimeter. This guide will take you from knowing absolutely nothing about electricity to confidently making real measurements. Let's go.
Safety First — Always
Before touching anything electrical, read this. Electricity can kill. These rules protect you.
The 230V in your Indian wall outlet can kill you. Learn on batteries first. When you do eventually measure mains, follow every step in this guide carefully.
Keep your hands dry
Water conducts electricity. Never use a multimeter with wet hands or near water.
One hand rule
When measuring high-voltage AC, keep one hand in your pocket. This prevents current from crossing your chest if something goes wrong.
Check the probes
Before every use, look for cracks or exposed metal on the probe cables. Damaged probes = dangerous.
Start with batteries
AA/AAA/9V batteries are completely safe to measure. They're the perfect learning tool.
Your TH-M98 has a "CAT III 600V" rating. This is a safety certification. CAT III means it's rated for measurements in household wiring and distribution boards. It's built with proper internal protection to handle high voltages safely — but that doesn't mean you should rush in. Learn the basics first.
One of the most common beginner mistakes is accidentally leaving the meter on Current (A) mode and then measuring voltage. This can blow the internal fuse — or worse. Always double-check your dial setting before probing anything.
What is Electricity?
Everything is made of atoms. Understanding atoms is the key to understanding electricity.
⚛️ The Atom — the building block of everything
Imagine an atom like a tiny solar system. At the centre is the nucleus (containing protons with a positive charge). Orbiting around it are electrons with a negative charge.
In most materials, electrons are tightly bound to their atoms. But in metals like copper and aluminium, the outermost electrons are very loosely attached — they can break free and drift from atom to atom.
Electricity is simply the movement of these free electrons. When billions of electrons start moving in the same direction through a wire — that's electric current.
✅ Conductors
Materials with free electrons that allow electricity to flow easily. Examples: Copper wire, aluminium, gold, silver, your body (!) — and that's why you can get shocked.
🛑 Insulators
Materials with no free electrons — electricity cannot pass through. Examples: Plastic, rubber, glass, wood, air. This is why wires have plastic coating.
The copper wire inside carries electricity. The plastic around it is an insulator — electrons can't escape through plastic, so you can hold a wire safely. If you strip the plastic off and touch the copper, you become part of the circuit!
Voltage, Current & Resistance
Three things describe every electrical situation. Think of water flowing through a pipe — it's a perfect analogy.
Like water pressure — the higher the voltage, the harder it pushes electrons.
Like how much water flows per second. More current = more electrons moving per second.
Like a narrow pipe — resistance opposes the flow of electrons.
| Concept | Symbol | Unit | Real-world example |
|---|---|---|---|
| Voltage | V | Volts (V) | AA battery = 1.5V · USB = 5V · Wall outlet = 230V |
| Current | I | Amps (A) or milliamps (mA) | LED = 20mA · Phone charging = 2A · Kettle = 10A |
| Resistance | R | Ohms (Ω), kΩ, MΩ | LED resistor = 220Ω · Human body (dry) = 100kΩ+ |
1000 milliamps (mA) = 1 Amp (A). Your meter's 200mA range means it can measure up to 0.2 Amps. Similarly, 1000 millivolts (mV) = 1 Volt.
Ohm's Law
The most important formula in all of electronics. Three things, one simple relationship.
Find Voltage
Find Current
Find Resistance
Real example: Connecting an LED to a 9V battery
An LED needs 20mA of current (0.02A) and drops about 2V across itself. Your battery is 9V. How much resistance do you need to protect the LED?
AC vs DC
There are two types of electricity. Your meter handles both — but you set the dial differently for each.
DC — Direct Current
Electrons always flow in one direction. Steady, constant. Like water flowing one way through a pipe.
Examples: Batteries, USB chargers, phone batteries, solar panels, your laptop's battery.
AC — Alternating Current
Electrons rapidly switch direction back and forth, 50 times per second (50Hz in India).
Examples: Wall outlets (230V), anything you plug into the wall — your fan, TV, fridge.
You must set your dial to the correct type. Measuring AC voltage with the dial on DC (or vice versa) will give you a wrong reading. Your TH-M98 has separate positions for AC voltage (V~) and DC voltage (V—) on the dial.
Your Themisto TH-M98 — Full Tour
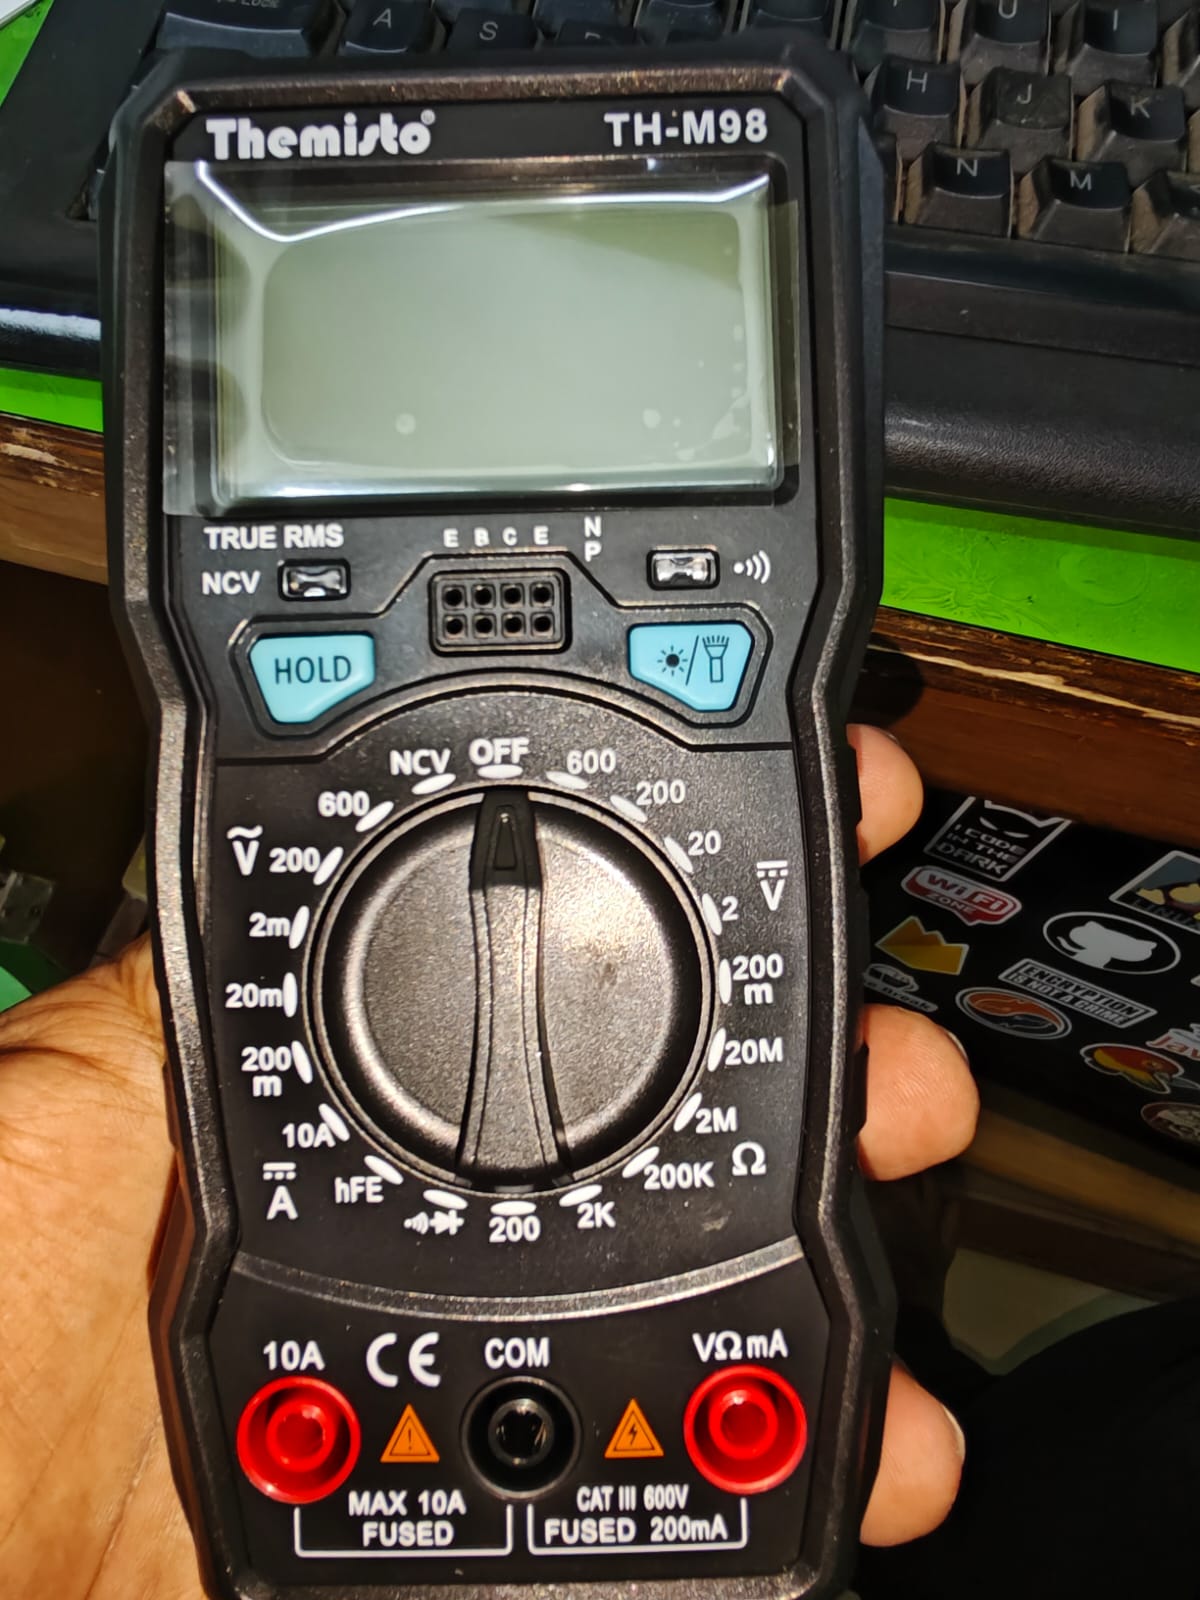
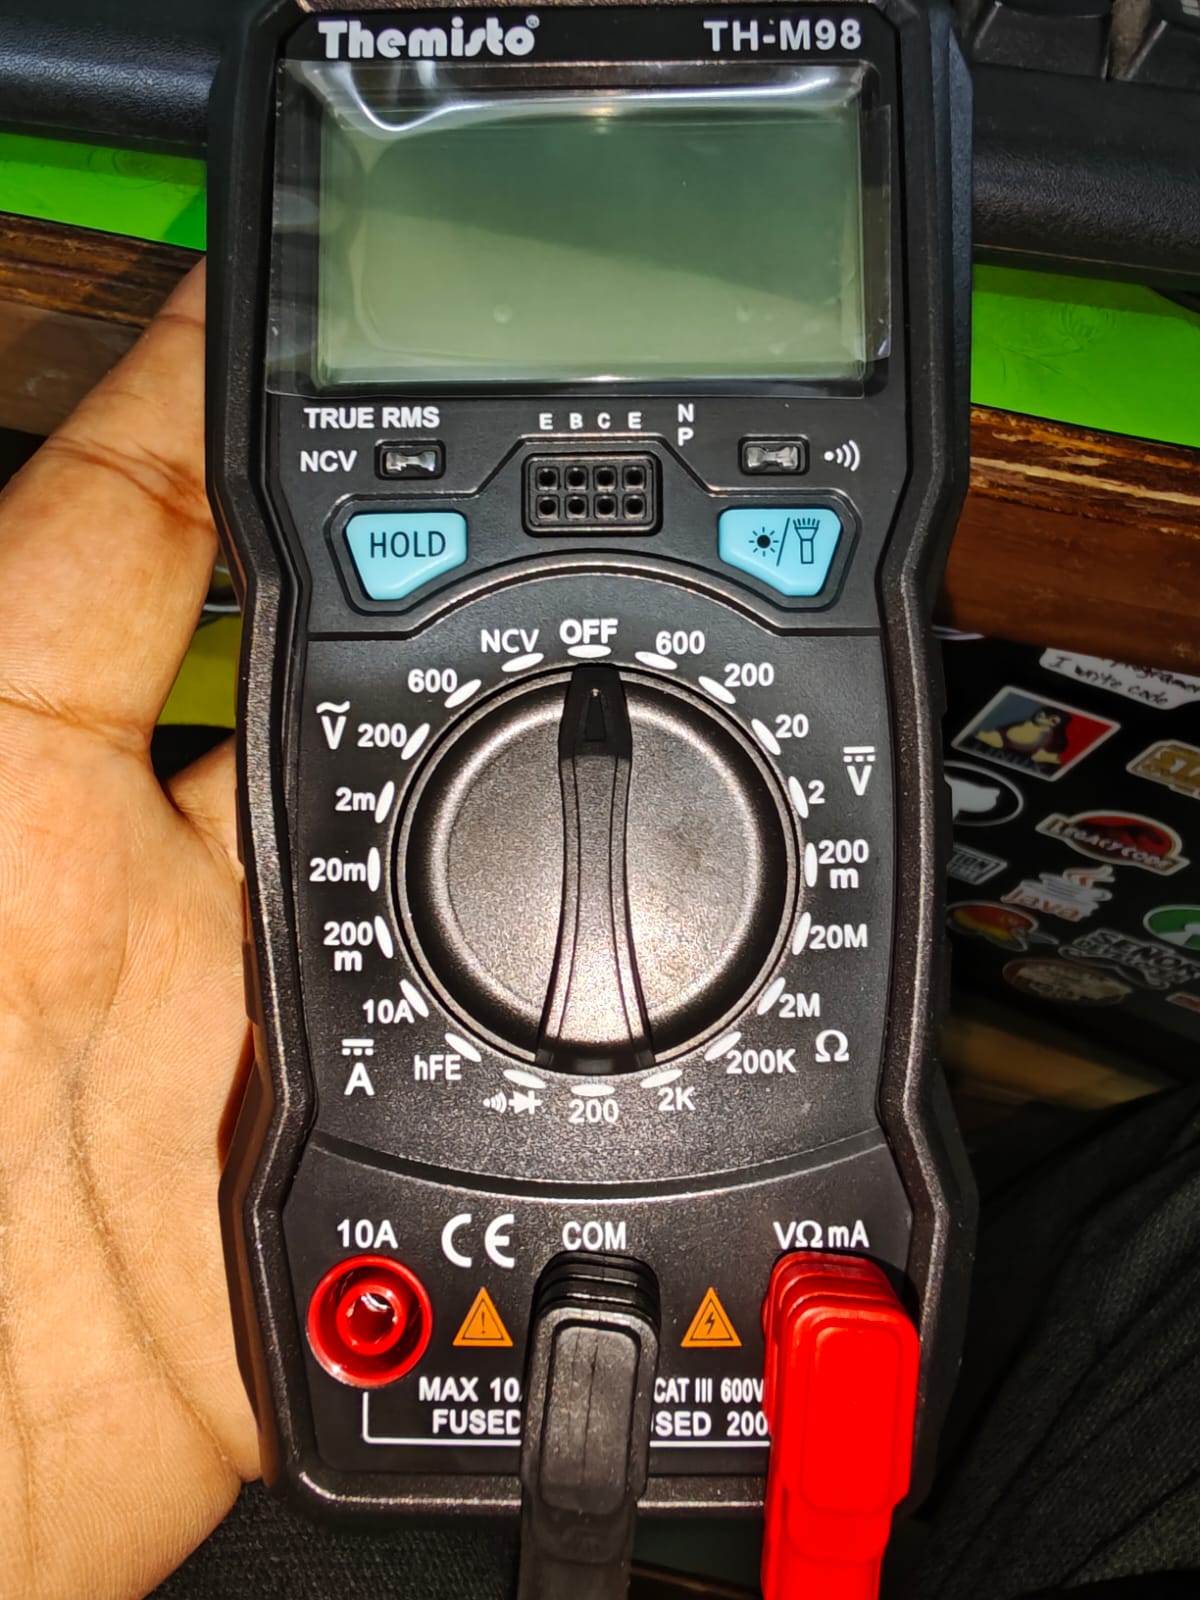
Let's identify every part of your meter before you touch anything.
LCD Display
Shows your measurement reading. Can display up to 4 digits. Also shows units (V, mA, Ω) and special symbols like OL (overload).
Rotary Dial
The big knob in the middle. This selects what you're measuring and what range. Always set this BEFORE connecting the probes.
HOLD Button (Blue)
Freezes the display so you can read it after removing the probes. Handy in tight spaces where you can't read the screen while probing.
Backlight Button (Blue)
Turns on a backlight so you can read the display in dark areas. The rightmost blue button with the sun/torch icon.
NCV Button
Non-Contact Voltage. Press this while hovering near a wire to detect if it's live — without touching it. The small switch at the top left.
Transistor Port
The 6-pin socket labeled E B C E / N P near the top. Used to test transistors (an advanced topic for later).
Battery Compartment
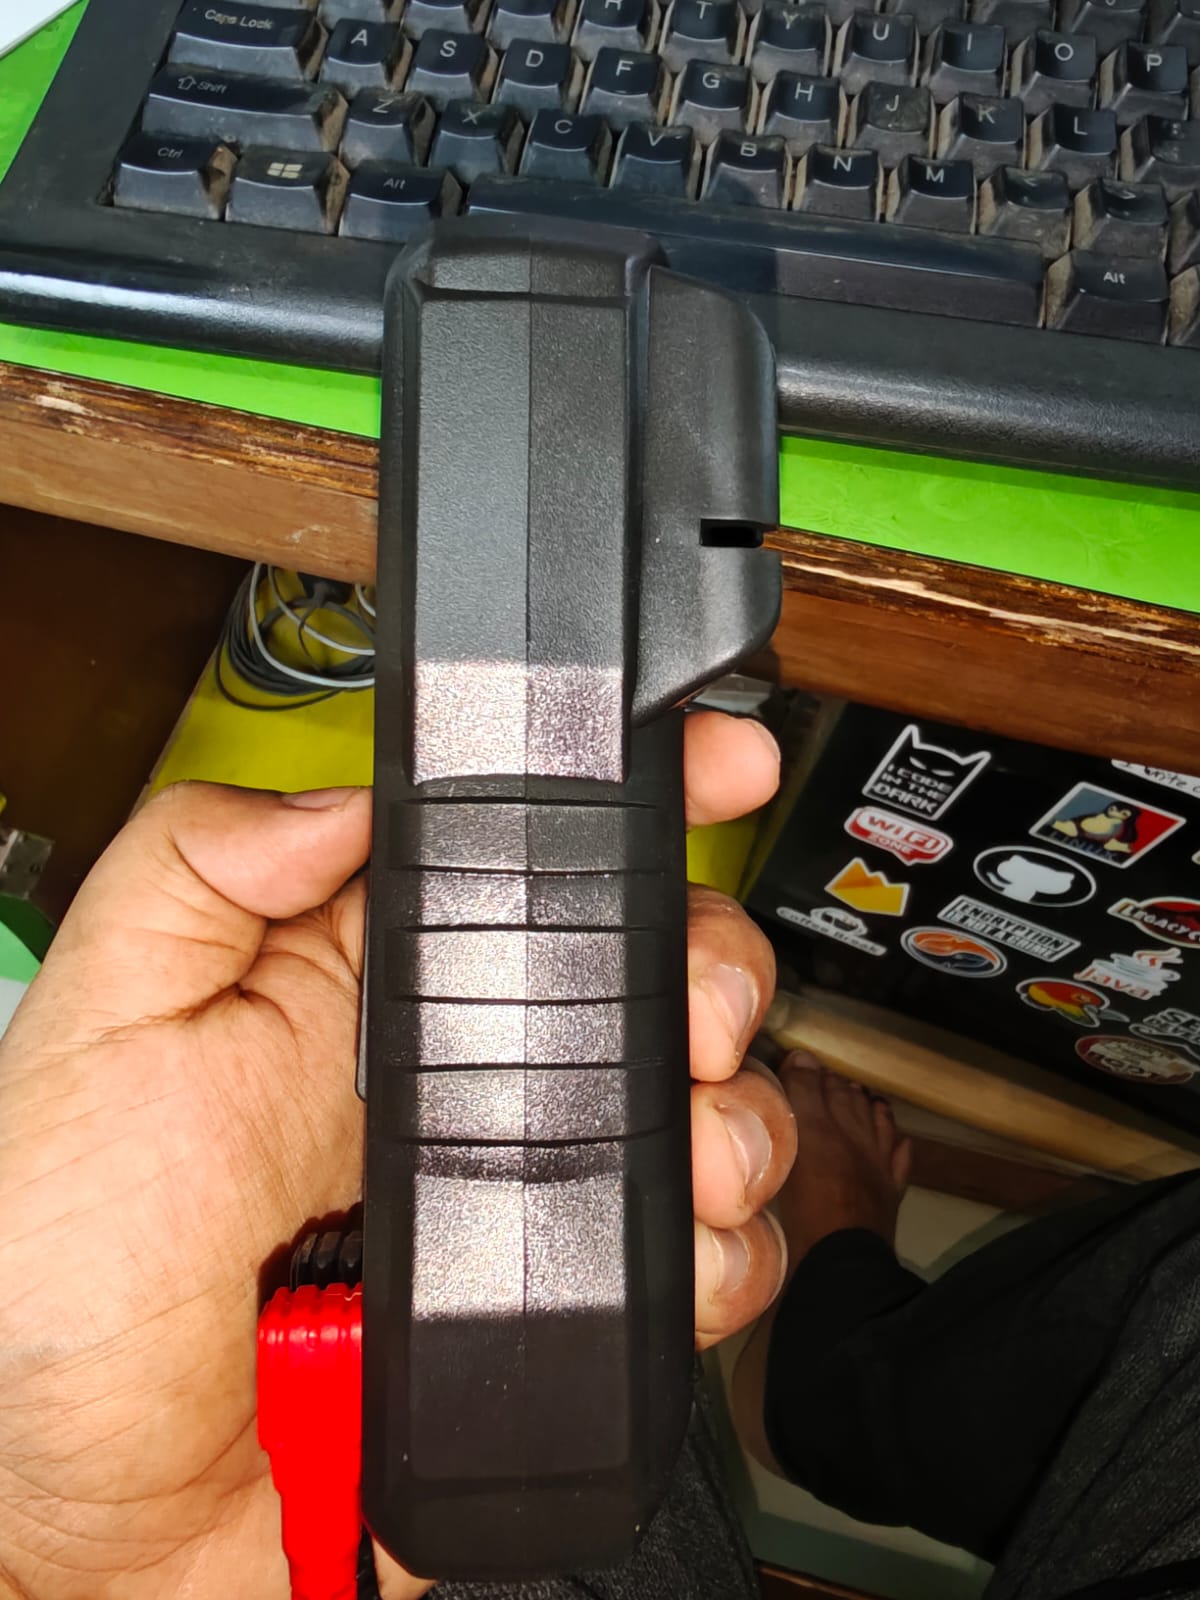
On the back. Contains a 9V battery that powers the meter itself. When the display gets dim, replace it.
True RMS
A quality feature. Means your meter gives accurate AC readings even for non-perfect waveforms (like from inverters and dimmers). Most cheap meters don't have this.
The Dial — Every Position Explained
The dial has zones for different measurements. Here's what each means.
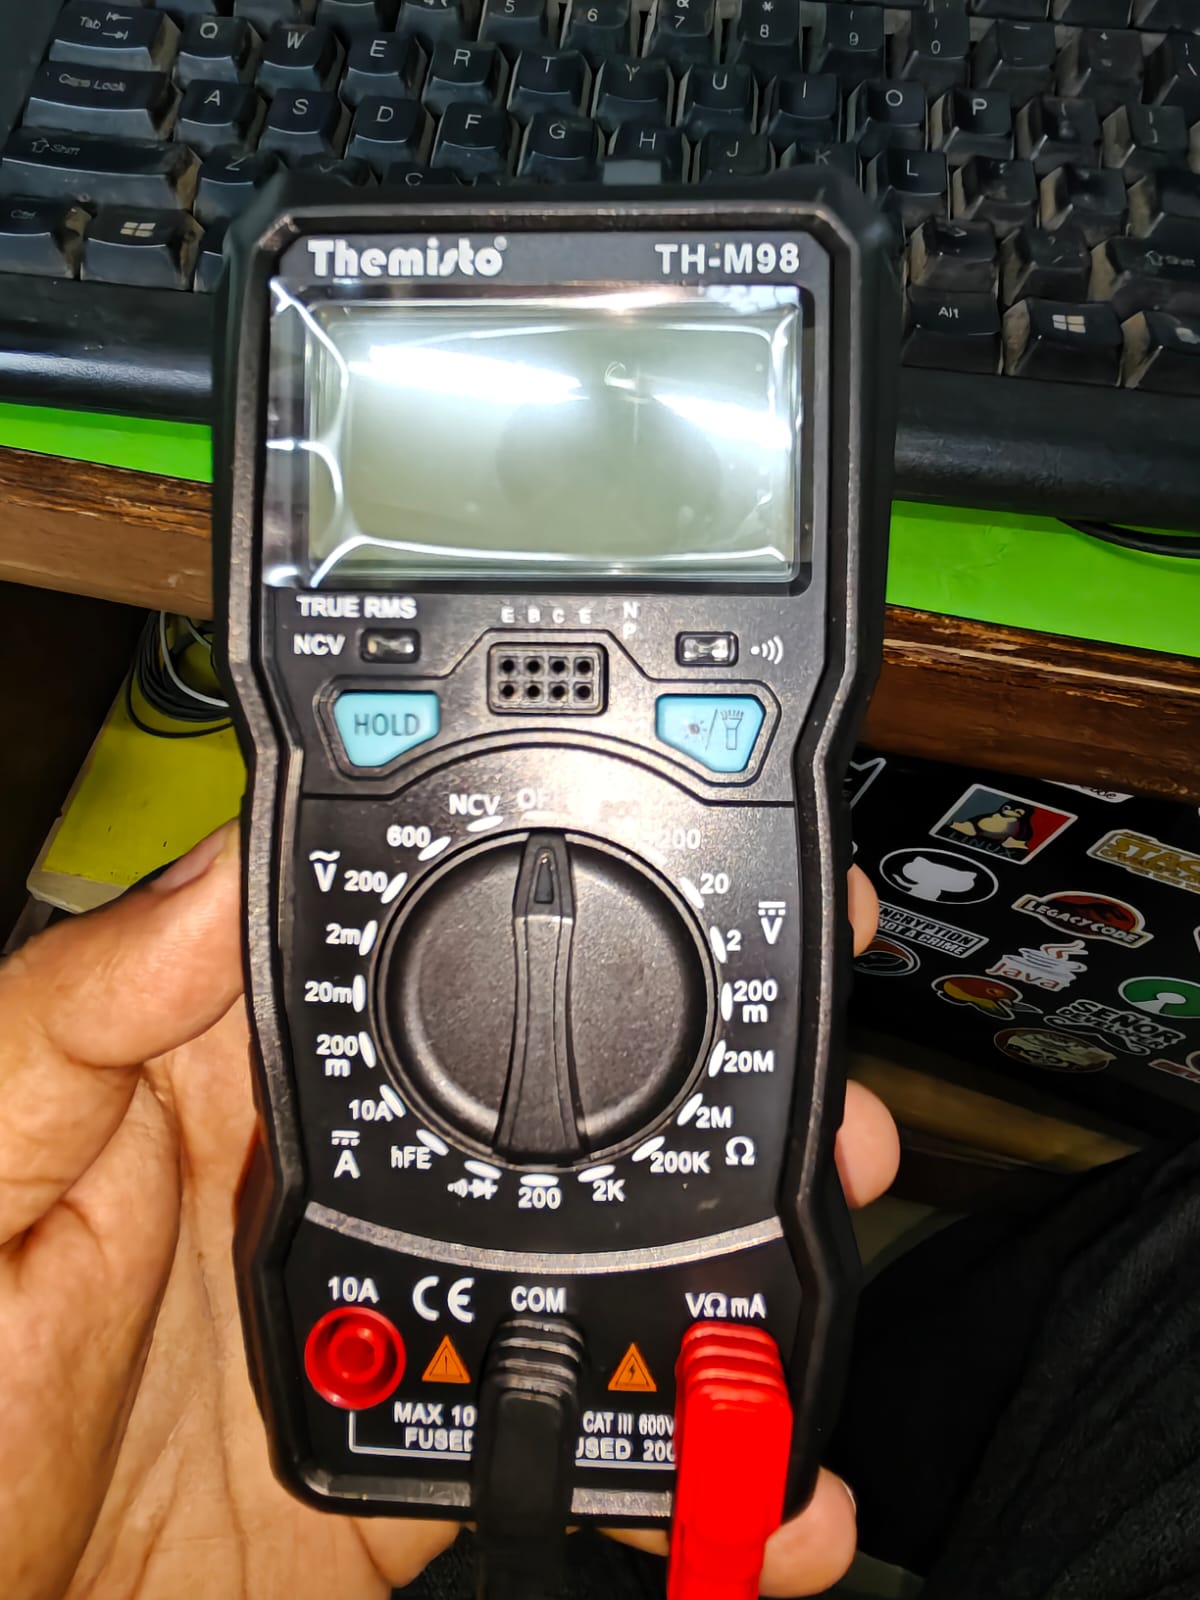
If you don't know the approximate value, start at the highest range. If the reading is too small to be useful (like 0.003 on the 600V range), move down to the next lower range. If you see OL on a lower range, move up. The goal is to get a reading that uses most of the display — like 4.86 is better than 0.005.
Plugging in the Test Probes
Your meter has two test probes — one red, one black. They plug into specific ports. Get this right every time.
The black probe never moves from the COM port. Only the red probe moves between VΩmA and 10A depending on what you're measuring.
Measuring Voltage
Start here. Measuring battery voltage is the safest, easiest first measurement — and it's genuinely useful.
Exercise: Measure a 9V or AA battery
Plug in your probes
Black probe → COM port · Red probe → VΩmA port. Check this every time.
Set the dial to DC Voltage
Turn the dial to the V— (DC) zone. For a 9V battery, pick the 20 range (since 9V is less than 20). For a 1.5V AA battery, pick the 2 range.
Touch the probes to the battery terminals
Red probe tip → positive (+) terminal of battery · Black probe tip → negative (−) terminal. You can touch both at the same time — it's completely safe with a battery.
Read the display
A healthy 9V battery reads around 9.0 – 9.4V. An AA battery reads 1.4 – 1.6V. A nearly dead battery might read 7.5V (9V type) or 1.1V (AA). Press HOLD to freeze the reading if needed.
| Battery Type | Dial Setting | Fresh Reading | Replace When |
|---|---|---|---|
| AAA / AA (1.5V) | V— · 2 range | 1.5 – 1.6V | Below 1.2V |
| C / D (1.5V) | V— · 2 range | 1.5 – 1.6V | Below 1.2V |
| 9V block | V— · 20 range | 9.0 – 9.5V | Below 7.5V |
| CR2032 coin (3V) | V— · 20 range | 3.0 – 3.3V | Below 2.6V |
| Car battery (12V) | V— · 20 range | 12.6V (full) | Below 12.0V |
Measuring AC Mains Voltage (Wall Outlet)
Wall outlets in India are 230V AC. This voltage is lethal. Don't rush this. Only proceed when you feel ready, and never if you're in any doubt.
Set dial to AC Voltage — 600V range
Turn dial to the V~ zone and choose 600. The Indian outlet is 230V, so 600 is the safe range to start.
Hold probes by the insulated handles only
Never touch the metal tips or anything ahead of the finger guards (the plastic ridges on the probes). One hand behind your back or in pocket.
Insert probes one at a time into the outlet
One probe into each slot. For AC voltage, polarity doesn't matter — red or black in either slot is fine.
Read the display
You should see roughly 220 – 240V. That's normal for India. Done! Remove probes carefully, one at a time.
Measuring Resistance
Resistance tells you how much a component opposes current flow. Super useful for identifying resistors and checking components.
Measuring resistance in a live circuit will damage your meter and give wrong readings. The component must be completely unpowered and ideally removed from the circuit.
Set dial to Resistance (Ω)
Pick a range. For a resistor labelled 1kΩ, use the 2K range. For a 47kΩ resistor, use the 200K range. Not sure? Start at 20M and work down.
Touch probes to both ends of the component
For resistance, polarity doesn't matter — you can put either probe on either end. Just touch both ends of the resistor.
Read the display
The number shows the resistance in Ohms (for the range you selected). On the 2K range, a reading of 1.00 means 1.00kΩ = 1000Ω.
Your body has resistance too (about 100,000Ω when dry). If your fingers bridge the two probe tips, your body resistance gets added to the reading and the result will be wrong.
| Component | Expected Resistance | Range to Use |
|---|---|---|
| Short wire / good conductor | 0 – 2Ω | 200 |
| LED (won't read like resistor — use diode mode) | OL in one direction | Diode mode |
| 220Ω resistor | ~220Ω | 2K |
| 10kΩ resistor | ~10kΩ | 200K |
| Human body (dry hands) | 100k – 2MΩ | 20M |
| Open circuit (broken wire) | OL (infinite) | Any |
The Continuity Test
This is one of the most useful functions on the meter. A BEEP means electricity can flow. No beep = broken.
What it does
When you touch the two probes together and place them across something, the meter checks if there's a low-resistance path (less than about 30Ω). If yes, it beeps. You don't need to look at the display — just listen.
Set dial to Continuity
Look for the symbol that looks like a sound wave ))) or the diode arrow →| — they're usually on the same dial position. Your TH-M98 has this at the bottom of the dial.
Touch probes together first
A quick self-test: the meter should beep immediately. This confirms the mode is active and your probes are working.
Touch probes to the component or wire
One probe on each end of a wire or fuse. Beep = good path (current can flow). Silence = open circuit or broken connection.
🔔 BEEP = Good
The wire is continuous, the fuse is intact, the switch is closed. Current can flow through it.
🔇 No Beep = Broken
The wire is broken, the fuse is blown, or the switch is open. Current cannot pass through.
Unplug it. Insert a piece of foil into one socket of the female end connecting two of the pins. Now put probes on the corresponding pins on the male plug. Beep = that wire is good. Test all three wires this way.
NCV — Non-Contact Voltage Detection
NCV lets you detect live wires without touching them. It's your electric "sixth sense."
How it works
Live AC wires create an electromagnetic field around them (like a tiny radio signal). The NCV sensor in your TH-M98's tip picks up this field. When it detects AC voltage, the meter beeps and the NCV LED lights up.
It only detects AC (like wall outlet power). It cannot detect DC (batteries won't trigger it).
Switch the NCV toggle to ON
There's a small slider switch near the top-left of your TH-M98 labelled NCV. Slide it to the active position. The dial can be on any setting.
Hold meter near the wire or outlet
Point the top of the meter (the probe tip end) toward the wire. Move it slowly closer.
Listen and watch
Beeping + LED flashing = AC voltage detected. The faster it beeps, the stronger the field (i.e., you're closer). No beep = no live AC there.
NCV tells you YES there's voltage / NO there isn't. It doesn't tell you how many volts. It can also give false positives near transformers or other electromagnetic sources. Always confirm with an actual voltage measurement when safety matters.
Reading the Display
The LCD can show different things. Here's what they all mean.
OL
Overload — the reading is higher than the range can handle. Switch to a higher range (e.g., from 20V to 200V).
−14.7
Negative reading — you've got the probes reversed. Swap red and black. (Harmless, just informational.)
0.00
Zero — no voltage/resistance detected, or component is a short circuit. Check connections and try again.
1.483
Normal reading — this is 1.483 in whatever units the dial is set to. On the 2V range, that's 1.483 Volts.
HOLD
Hold indicator — appears when you press HOLD. The reading is frozen. Press HOLD again to resume live readings.
🔋 LO BAT
Low battery — the 9V battery inside the meter is running out. Replace it (accessible from the back panel).
On the 20V DC range, a reading of 9.12 means 9.12 Volts. On the 200V range, 9.1 means 9.1 Volts (less precision). The lower the range, the more decimal places — and the more precise your reading.
Beginner Projects
Put your knowledge to work. These are real tasks you can do right now with your TH-M98 and things you likely have at home.
Glossary
Every term used in this guide — explained simply.